Crunchy Bridge Postgres Source Setup Guide
ClickPipes supports Postgres version 12 and later.
Enable Logical Replication
Crunchy Bridge comes with logical replication enabled by default. Ensure that the settings below are configured correctly. If not, adjust them accordingly.
Creating ClickPipes User and Granting permissions
Connect to your Crunchy Bridge Postgres through the postgres user and run the below commands:
-
Create a Postgres user exclusively for ClickPipes.
-
Grant read-only access to the schema from which you are replicating tables to
clickpipes_user. Below example shows granting permissions for thepublicschema. If you want to grant access to multiple schemas, you can run these three commands for each schema. -
Grant replication access to this user:
-
Create publication that you'll be using for creating the MIRROR (replication) in future.
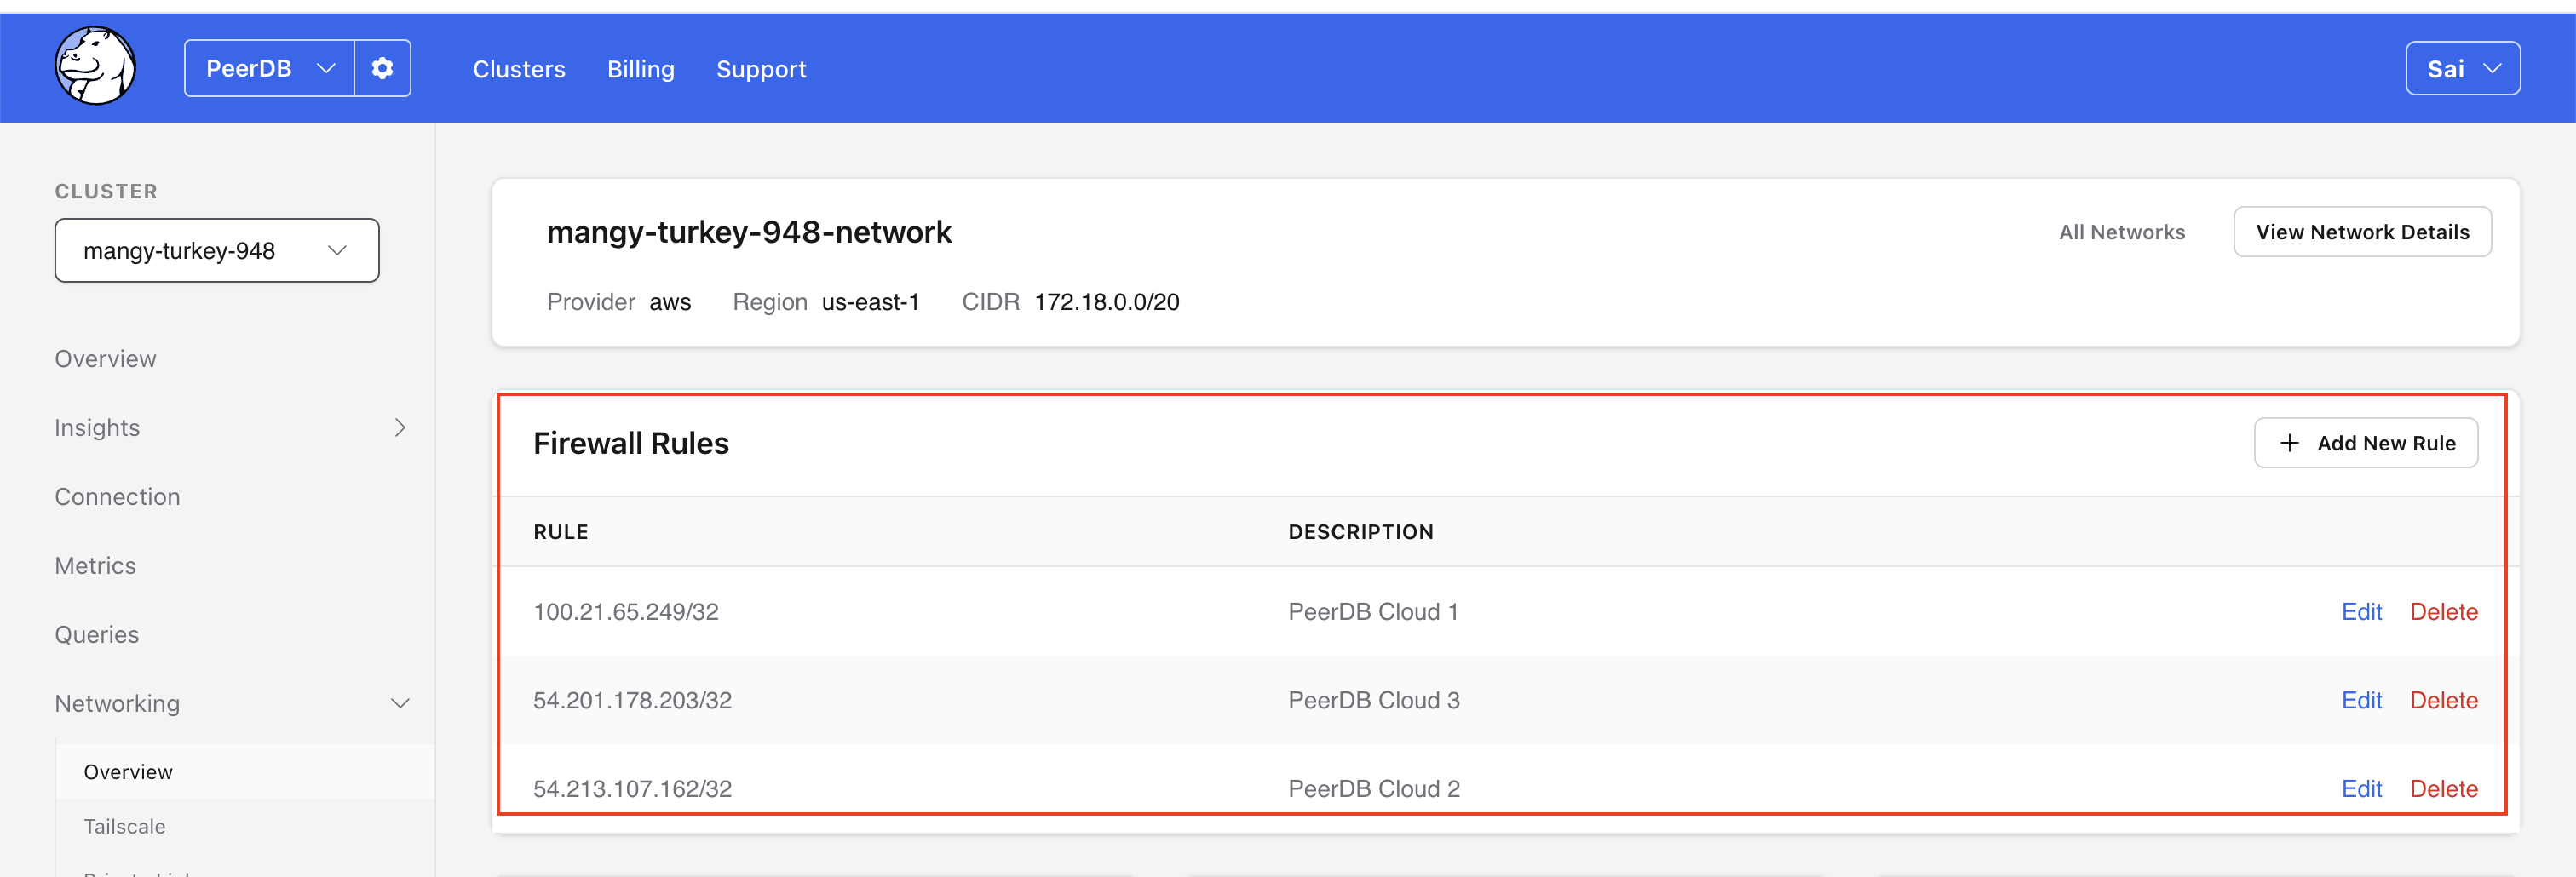
Safe list ClickPipes IPs
Safelist ClickPipes IPs by adding the Firewall Rules in Crunchy Bridge.

What's next?
You can now create your ClickPipe and start ingesting data from your Postgres instance into ClickHouse Cloud. Make sure to note down the connection details you used while setting up your Postgres instance as you will need them during the ClickPipe creation process.